The No Makeup Makeup Look in Photoshop
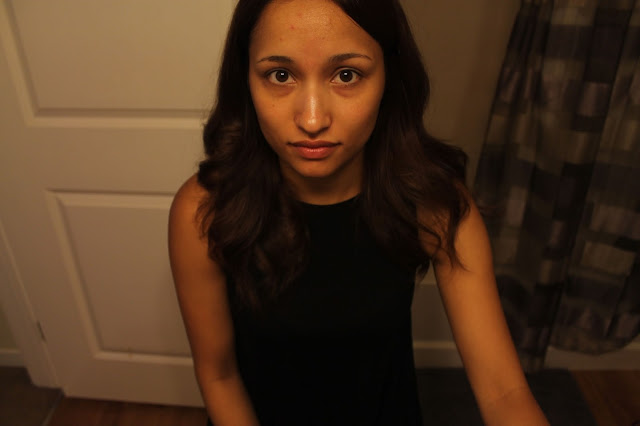
My favorite part of Photoshop is that there are endless possibilities. There are "guidelines" but there really aren't any rules to follow, allowing you to achieve the same end product using many different tools. For the purposes of my quick tutorial, I've chosen to focus on smoothing out the skin. Photoshop is my fast acne cover-up, my zombie dark circle quick fix, and basically my one-stop shop for all skincare needs. Who needs that hundred dollar Luna Sleeping Oil when you have the power of technology at your fingertips. I've chosen a mildly scary picture of myself sans makeup to demonstrate.

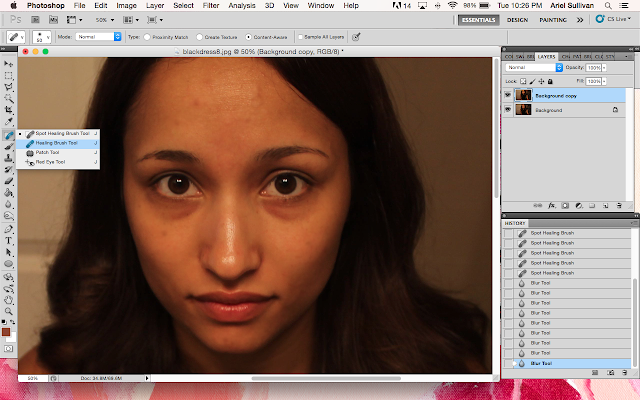
1. The first thing I will suggest is that you duplicate the background copy. This way you can edit the copy and leave the original locked and untouched so that you have something to compare. Simply "grab" the layer and drop it over the little paper symbol next to the trashcan. Now you've made a copy of the same layer. Make sure you click on the one that says copy, since that'll be the one we are editing.
2. Now for smooth skin! I'm going to start with the Spot Healing Brush Tool. This nifty little tool is essentially a spot remover and it does so by taking whatever is surrounding the circle and filling it in with that. At least that's the scientific explanation. The bigger the circle, the more pigment it's going to grab so it's best to start small, with a brush size that's only slightly bigger than what you're trying to cover up. I used this on the bigger, more obvious blemishes to get them out of the way.
It's best to zoom in for this. For Macs, click Command / Option and use the + or the - to zoom in and out. For Windows users, hold Shift and the + or -
The blemishes are starting to become less visible, but they aren't perfect. I want it to be all gone, and for that we're going to play around with some other tools. The Spot Healing Brush Tool is great, but isn't exactly the best when used alone, especially since my skin in this photo is more textured and not "soft."
3. So I'm going to soften up my skin a little bit by using the Blur Tool. Be careful with this tool because it's easy to think that by blurring out blemishes, they're going to disappear. While sometimes true, the Blur Tool can also make something like skin appear flat. To avoid this, I steer clear from blurring any edges or places that need definition, like the contours of my nose and lips. Just hold your mouse down and blur over skin only, making sure to also not get the eyes and eyebrows.
The difference shouldn't be drastic, just consistent throughout. Basically my skin lost a little bit of it's glean in the forehead and the bridge of the nose, but that was the intention. Blurring also pulled back the imperfections.
 |

5. I then went over the skin with the blur tool again.
6. Okay, you can end here or you can be a stubborn perfectionist and make a little more changes like I would. The eyebrow on the left of this photo looks a little sparse. I used the Clone Stamp Tool to recreate some brows so they could at least be kind of on fleek. This tool works similarly to the Healing Brush where it takes from a source using Alt and then a specified area. Only this one is actually a stamp. Make sure the opacity is below 100%. See what looks more natural to you. Then, I took close-by sections of my eyebrow and used them to fill in the gaps. Just like my Brow Wiz.
While I was at it, I used the Clone Stamp Tool to also get rid of the dark circles under my eye and smooth out my lines. The opacity is super low on this one at 13%. I would play around with this, especially because you could get some awkward lines.
There we go.
7. Now let's change the color of the photo by playing around with the Brightness/Contrast. My skin looks a little lackluster so let's change that.
Ah, some good ole vitality.
So it went from this:
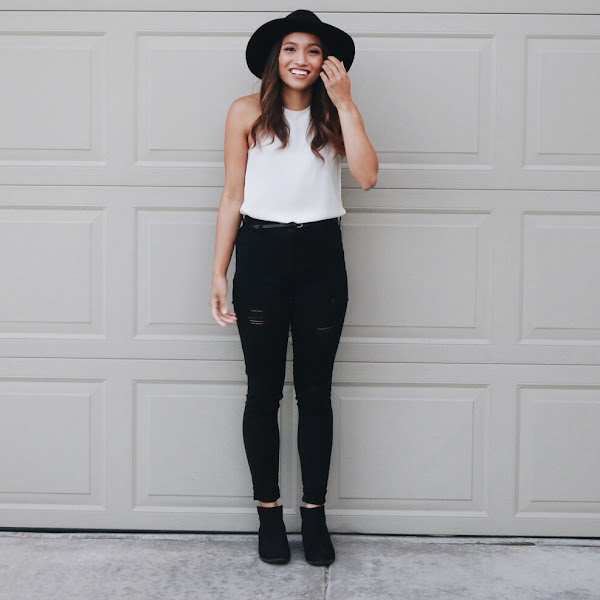
To this:
Of course there is roughly about a thousand more things that you could do with this picture, but the basics are all covered. I hope you had fun playing around in Photoshop! Feel free to share any of your own tips and tricks and how you would edit your bathroom selfie! Or you can share your own makeup-free pictures so I know that I'm not alone in my zombieness. #undeadpride
XO,
Ariel


No comments: